
Step by Step
Fascia, Soffit and Gutter Installation
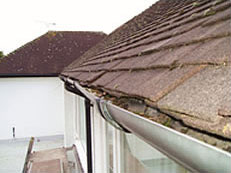
Step 1
Shown here is a typical example of worn and mis-aligned guttering found on the majority of properties over twenty years old.
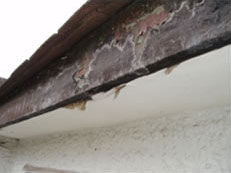
Step 2
The old guttering has been removed to expose a badly rotten fascia board. This is a common situation caused by the fact that the timber above the line of the gutter does not receive the same maintenance as that which is below the gutter.
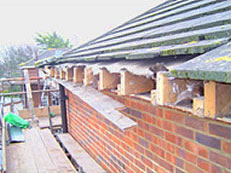
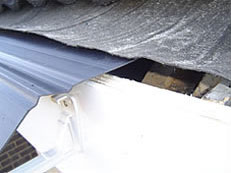
Step 3
All of the old timber is now being removed, allowing inspection of the rafter feet. Also shown here is the deteriorating sarking felt which is dealt with later in the process.
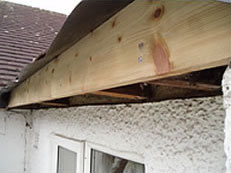
Step 4
A new pre treated tanalised timber support is fitted to the ends of the rafter feet to ensure good support for the roofing tiles, uPVC fascia, soffit and guttering.
Step 5
A new uPVC soffit is now fitted. Venting is optional (at no extra cost) and will be discussed at the time of your quotation.
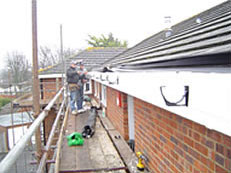
Step 6
The new uPVC fascia is now fitted to the timber support using white headed stainless steel marine grade fixing pins.
Step 7
New PVC sarking trays are fitted to replace the rotten sarking felt (in some cases a flexible PVC membrane will be used depending on tile type.
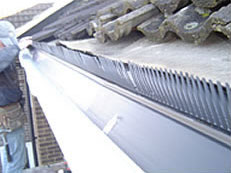
Step 8
A PVC comb filler is fitted to prevent the ingress of nesting birds (depending on tile type).
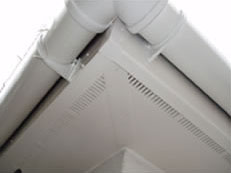
Step 9
All corners are neatly mitred and soffits sealed.
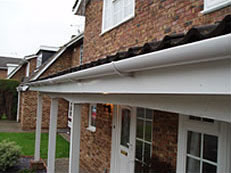
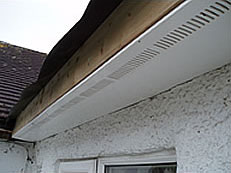
Step 10
The finished job… No more painting. No more leaky gutters!
For a free site survey to view samples of colours and styles and an installation quotation, please call us now on 0800 7312092 to arrange a convenient time.